Become a Guardian of Privacy: Your Beginner's Guide to Running a Monero Node

Monero, the leading privacy-focused cryptocurrency, relies on a decentralized network of computers to function. These computers, known as "nodes," are the backbone of the Monero network, verifying transactions and maintaining the blockchain. You might have heard about running a node and wondered if it's something you could do. The good news is, even with limited technical experience, you can contribute to Monero's strength and privacy by running your own node!
This guide is designed to walk you through the process of setting up and running a Monero node in a way that's easy to understand, even if you're not a tech whiz. We'll cover everything from choosing the right software to troubleshooting common issues, so you can confidently join the ranks of Monero node operators.
Why Run a Monero Node?
Before we dive into the "how," let's quickly touch on the "why." Running a Monero node is more than just a technical exercise; it's a meaningful contribution to the Monero ecosystem and offers several benefits:
- Strengthening the Network: Each node adds to the robustness and decentralization of the Monero network. More nodes mean greater resilience against attacks and censorship.
- Enhanced Privacy and Security: When you use your own node, you are directly interacting with the Monero network. This eliminates the need to rely on third-party nodes, improving your privacy and reducing trust in external services.
- Full Control and Verification: Running a full node allows you to independently verify transactions and the blockchain, ensuring you're not relying on anyone else's interpretation of the Monero ledger.
- Supporting Decentralization: By running a node, you're actively participating in the decentralized nature of cryptocurrency, moving away from centralized control and towards a more distributed and resilient system.
Step 1: Choosing and Downloading the Right Software
The first step is to choose the software you'll use to run your Monero node. The official Monero project provides the most reliable and up-to-date software, and for beginners, the Monero GUI Wallet is highly recommended.
Think of the GUI Wallet as the all-in-one package for Monero. It not only allows you to send and receive Monero but also includes the node software within it. This makes setting up a node incredibly straightforward.
Here's how to download the Monero GUI Wallet:
- Go to the official Monero website: The safest and most reliable place to download Monero software is from the official website: getmonero.org. Always double-check the website address to avoid phishing attempts.
- Navigate to the "Downloads" section: On the website, look for a "Downloads" or similar section, usually prominently displayed in the navigation menu.
- Choose your operating system: You'll see options for different operating systems like Windows, macOS, and Linux. Select the version that matches your computer's operating system.
- Download the GUI Wallet: Click on the download link for the GUI Wallet. You'll likely be offered different download options like
.zip,.tar.gz, or.dmgdepending on your OS. For beginners, the standard download is usually sufficient. - Verify the download (Optional but Recommended): For increased security, you can verify the download against the official signatures provided on the Monero website. This ensures that the file you downloaded hasn't been tampered with. Instructions for verification are usually provided in the download section or on the Monero website's documentation. While optional for beginners, it's a good security practice to learn.
Once the download is complete, you're ready to install the Monero GUI Wallet.
Step 2: Installing and Setting Up Your Monero Node
The installation process is similar to installing any other software on your computer.
Installation Steps:
- Windows: Double-click the downloaded
.zipfile and extract its contents to a folder of your choice (e.g.,C:\Monero). Then, run themonero-wallet-gui.exeexecutable file inside the extracted folder. - macOS: Double-click the downloaded
.dmgfile. Drag the Monero Wallet application icon to your "Applications" folder. Then, open the Monero Wallet application from your Applications folder. You might need to bypass macOS security prompts the first time you run it by right-clicking the application and selecting "Open." - Linux: The installation process on Linux can vary slightly depending on your distribution. Typically, you'll download a
.tar.gzfile. Extract the contents of this file to a directory of your choice. You can then run themonero-wallet-guiexecutable from within the extracted directory. You might need to make the executable file runnable using the commandchmod +x monero-wallet-guiin your terminal.
Setting Up the Node:
After installation, launch the Monero GUI Wallet. The first time you run it, you'll be guided through a setup process. Here's what you'll typically see:
- Language Selection: Choose your preferred language.
- Wallet Creation/Restoration (Optional for Node Operation): You'll be asked if you want to create a new wallet or restore an existing one. While you can use the GUI wallet to manage your Monero, for the purpose of just running a node, you don't actually need to create or restore a wallet at this stage. You can skip this step if you only want to run a node initially, and create or import a wallet later. However, having a wallet within the GUI is convenient for using your node.
- Node Mode Selection: This is the crucial part for running a node. You'll likely be presented with options for "Simple Mode," "Advanced Mode," and sometimes "Bootstrap Mode."
- Choose "Simple Mode" (Recommended for Beginners): Simple mode is the easiest way to start running a node. It will automatically configure your node to connect to the Monero network.
- "Advanced Mode" provides more customization options, such as choosing a specific remote node to connect to initially or configuring Tor. While useful for more experienced users, "Simple Mode" is perfect for beginners.
- "Bootstrap Mode" is sometimes offered as a way to speed up initial synchronization. It involves downloading a pre-synced blockchain snapshot. While it can be faster, it slightly reduces the trustless nature of a full node. For beginners, syncing from scratch using "Simple Mode" is generally recommended for a full understanding and more secure setup.
- Data Directory: You'll be asked to choose a location on your computer to store the Monero blockchain data. The default location is usually fine, but if you have limited space on your primary drive, you can choose another location with sufficient free space. Important: The Monero blockchain is quite large (hundreds of gigabytes and growing), so ensure you have enough free disk space (at least 300-400 GB recommended, and ideally more for future growth).
- Bandwidth Limits (Optional): You might be able to set limits on the upload and download bandwidth your node uses. If you have a slow internet connection or bandwidth caps, you can adjust these settings. However, for optimal network contribution, it's best to leave these settings at their default values (unlimited if possible) if your internet allows.
After configuring these settings, the Monero GUI Wallet will start, and your node will begin the process of synchronizing with the Monero blockchain.
Step 3: Syncing Your Node - Patience is Key
Syncing the blockchain is the process where your node downloads and verifies all historical Monero transactions, effectively building a complete and up-to-date copy of the Monero ledger. This is the most time-consuming part of setting up a node, and it requires patience.
What to Expect During Syncing:
- Progress Bar: The Monero GUI Wallet will display a progress bar indicating the synchronization progress. This bar will show you how far along you are in downloading and processing the blockchain.
- Time to Sync: The initial synchronization can take a significant amount of time, ranging from several hours to even days, depending on your internet connection speed, computer processing power, and the current size of the blockchain. Don't be alarmed if it takes a long time – this is normal.
- Disk Space Usage: As your node syncs, it will gradually use more disk space as it downloads and stores the blockchain data. Keep an eye on your disk space to ensure you don't run out.
- Network Activity: You'll notice network activity as your node downloads data from other nodes on the Monero network.
Tips for Faster Syncing:
- Good Internet Connection: A fast and stable internet connection will significantly speed up the syncing process. Avoid using Wi-Fi if possible and use a wired Ethernet connection for better stability and speed.
- Leave Your Computer Running: The syncing process needs to run continuously. Leave your computer turned on and the Monero GUI Wallet running until the synchronization is complete. Don't close the application or shut down your computer during syncing.
- Sufficient Disk Space: Ensure you have ample free disk space available before starting the sync. Running out of disk space mid-sync can cause problems.
- Limited Bandwidth Usage (If Necessary): If your internet connection is very slow or you have bandwidth caps, you can consider setting bandwidth limits in the Monero GUI Wallet settings after the initial sync is complete. However, during the initial sync, allowing unlimited bandwidth (if possible) will speed up the process.
Once Syncing is Complete:
You'll know syncing is complete when the progress bar in the Monero GUI Wallet reaches 100%, and the status typically changes to "Synchronized" or similar. Congratulations! You are now running a fully synced Monero node!
Using Your Node and Contributing to the Network
Once your node is synced, it's actively participating in the Monero network. It's verifying transactions, relaying blocks, and helping to keep the network secure and decentralized. You don't need to do anything special; simply keep the Monero GUI Wallet running in the background.
Using Your Own Node with Your Wallet:
The Monero GUI Wallet is already configured to use your local node by default. This means that when you send or receive Monero using the wallet within the GUI, it will use your own node to interact directly with the Monero network. This is a key privacy benefit of running your own node.
When you use your own node, you are no longer relying on public or third-party nodes, which could potentially log your IP address or transaction details. Your transactions are routed through your own node, enhancing your privacy.
Sending and Receiving Monero with Your Node:
To experience the full circle of running a node, you can now try sending or receiving a small amount of Monero using the wallet within the GUI. You can obtain a Monero address from a friend or exchange, or generate a new address within your wallet.
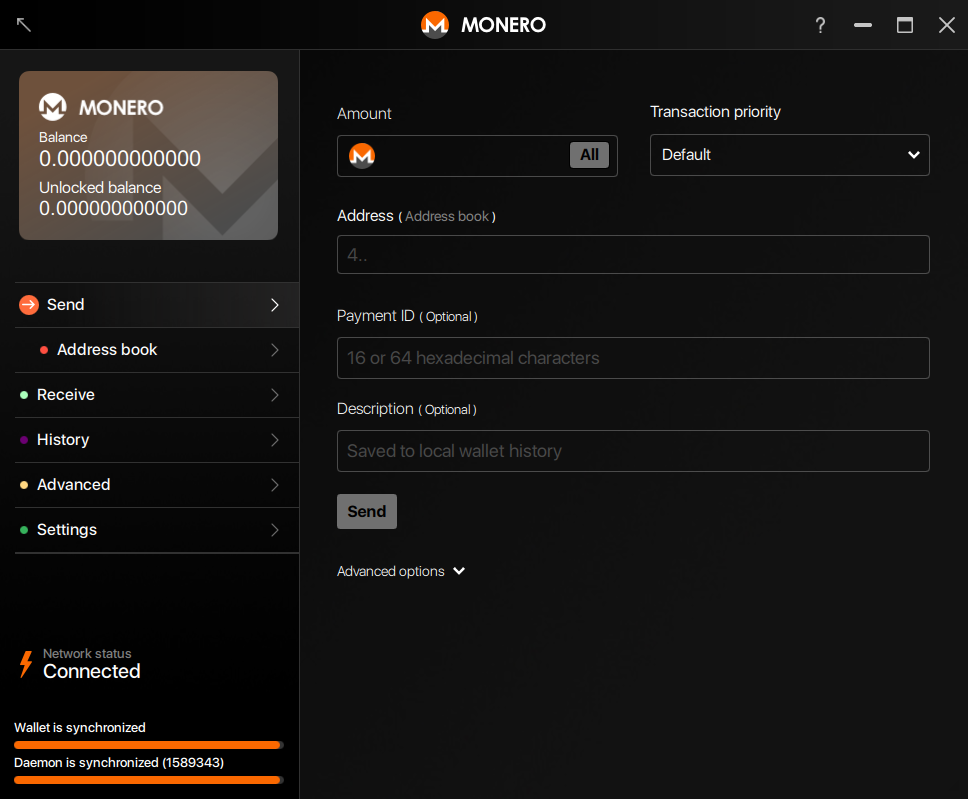
When you send a transaction, your wallet will use your local node to broadcast the transaction to the Monero network. When you receive Monero, your node will be aware of the incoming transaction and update your wallet balance. Seeing a transaction go through while using your own node can be a rewarding experience, demonstrating the power and privacy of the Monero network you're now actively supporting.
Basic Troubleshooting: Common Connection Issues
Sometimes, you might encounter issues with your Monero node connecting to the network or syncing. Here are some common problems and basic troubleshooting steps:
- Firewall Issues: Your computer's firewall or router firewall might be blocking the connections needed for your Monero node to communicate with the network.
- Solution: Configure your firewall to allow incoming and outgoing connections for the Monero GUI Wallet application (or
monerodprocess if you are using the command-line daemon). You might need to create exceptions or rules in your firewall settings to allow traffic on the default Monero ports (typically port18080for mainnet). Consult your firewall software's documentation for instructions on how to add exceptions.
- Solution: Configure your firewall to allow incoming and outgoing connections for the Monero GUI Wallet application (or
- Port Forwarding (Less Common for Simple Nodes): In some network setups, especially behind certain routers or network address translation (NAT), you might need to configure port forwarding on your router to allow incoming connections to your node from the internet.
- Solution: Port forwarding is generally not required for basic node operation, especially if you are just running a node to support your own wallet usage. It's more relevant if you want your node to be more publicly accessible to other nodes. If you suspect port forwarding might be an issue, consult your router's documentation on how to configure port forwarding. You'll typically need to forward port
18080(or the port your Monero node is configured to use) from your router to the internal IP address of your computer running the node.
- Solution: Port forwarding is generally not required for basic node operation, especially if you are just running a node to support your own wallet usage. It's more relevant if you want your node to be more publicly accessible to other nodes. If you suspect port forwarding might be an issue, consult your router's documentation on how to configure port forwarding. You'll typically need to forward port
- Slow or Stalled Syncing: If syncing is very slow or seems to have stalled:
- Check Internet Connection: Ensure you have a stable and working internet connection.
- Restart the Monero GUI Wallet: Sometimes, simply restarting the application can resolve temporary glitches.
- Check Disk Space: Make sure you haven't run out of disk space.
- Check Node Status: Look at the "Status" tab in the Monero GUI Wallet. It might provide information about connection issues or synchronization progress.
- Consider Using a Bootstrap Node (Advanced, Use with Caution): As mentioned earlier, "Bootstrap Mode" can sometimes speed up initial sync, but it comes with slight trust trade-offs. If you are comfortable with this, you can research bootstrap options.
- "No Peers Found" or Connection Errors: If your node shows errors related to "no peers found" or connection issues, it might indicate problems connecting to other nodes on the network.
- Wait and Retry: Sometimes, network connectivity can be temporarily disrupted. Wait for a while and let the node attempt to reconnect.
- Check Firewall Again: Double-check your firewall settings to ensure they are not blocking connections.
- Restart Router/Modem: Restarting your router and modem can sometimes resolve network connectivity issues.
For more advanced troubleshooting, or if you want to enhance your node's privacy further, you can explore running your Monero node over Tor. This adds an extra layer of anonymity to your node's network traffic. Here's a helpful video that explains how to set up a Monero full node over Tor:
Running your Monero node over Tor is an optional step, but it can be beneficial for users who prioritize maximum privacy and want to further obscure their node's IP address from the public network. The video provides a step-by-step guide for this more advanced setup.
Conclusion: Welcome to the Monero Network Guardians!
Running a Monero node might seem daunting at first, but as you've seen, it's a surprisingly accessible process, especially with the user-friendly Monero GUI Wallet. By following these steps, you've not only set up your own private gateway to the Monero network but also become an active participant in strengthening its privacy and decentralization.
Every node counts, and by keeping your node running, you are making a valuable contribution to the Monero ecosystem. You are helping to ensure a more robust, resilient, and private cryptocurrency for everyone. Welcome to the community of Monero node operators – the guardians of privacy in the digital age!